Random Posts
-

Restomod Car: Engine 1
With an old, regular, car like this, it is usually abandoned for a crusher, or parts hunter, however restoring and rebuilding it better than stock […]
-

Dumble ODS: 2. Mods
Doing a copy of an amp can be a good learning experience, modifying it to suit your needs and taste, however, can be the really […]
-

Saving monitors: leaky capacitors
A common issue with electronics are when small insignificant components fail. Fixes then usually only depend on 1) Knowledge/problem solving and 2) 1-2 $/€/£ in […]
-

Turning laptops into mini-servers
One of the most common e-waste sources out there is laptops, slower than other computers and often not upgradable, lacking ability to change peripherals, like […]
-

Headphone repair
When headphones wear out it’s not unusual to effect the soft fabric parts only, so can eb saved by replacement, or you can prevent failure […]


Restomod Car: Engine 1
With an old, regular, car like this, it is usually abandoned for a crusher, or parts hunter, however restoring and rebuilding it better than stock is both financially easily attainable and can bring nice active relaxation. This project car is an 1996 Opel Astra 1.4 Si Hatchback, 82 bhp. It has been stored for ten years in a cold garage with several issues to deal with and a lot of things to consider given having been through such long term storage. It is, however, a well welcomed distraction and opportunity for relaxing productive activity, far from my everyday work and not close to my regular computation, audio or guitar projects. To start with, up with the car in the air and add some support. Here it is in all its 10 year dust splendor (the color is actually the same burgundy as in the images below, the camera and light shifted it).
A glimpse of, perhaps, a few years from now below, as the goal. As such, pretty much all essential parts of the car needs work, engine, suspension, breaks, fueling, exhaust, as well as a not insignificant amount of aesthetics to be able to drive the car as a decent secondary daily or winter car.
First steps is getting the engine running, running well, and running safely. To start with, when an engine sits for this amount of time, the oil that are lubricating the cylinders have dripped down into the sump and just turning the key risks damaging the dry engine. To fix this there are several solutions, using what’s called fogging oil that is sprayed into the cylinders, or products called things like “magic oil”. generally this is a penetrating oil that are sprayed in the cylinders after taking out the spark plugs, slowly dissolving potential rust-residues and coating the cylinder walls. For this I make my own, mixing ATF (Automatic transmission fluid) and acetone, about 50/50 mix, you can use diesel instead of acetone. Spraying this into the cylinders also helps releasing potentially seized engines, if I should be so unlucky.
With the spark plugs out you can later (~24h) safely turn the engine. Best do this by hand, in many cases you can fit a ratchet on the engine crank, in this case accessed behind front left wheel behind a removable cover. Luckily this engine turns over fine so time to change the motor oil, oil filter, spark plugs. At this point I also check the spark-wires looking for low and even resistance using a DMM (digital multimeter, measuring resistance in ohms) to make sure any issues does not originate in them, these wires can go bad and may need changing (should be low and even resistance, just a few ohms).
Since old gasoline goes bad with time, it was necessary to empty the gas tank, the octane rating goes down leading to a less flammable and thus weaker propellant. Easily spotted the car did not start on the existing fuel, neither did it start by adding some new fuel to mix in with the old, but did start well on starter gas sprayed into the air inlet. Here the tank was accessed through a hatch under the rear seat.
With new gas in the tank, some additives to clean the injectors and a fresh battery, it’s time to turn the key for the first time. Using some start gas sprayed into the intake (behind the engine air box) helps this along. The engine started, but does not stay running, first real issue, a fuel hose has cracks and leaks by spraying the firewall of the engine bay with fuel, not good. This engine does rely on computer controlled fuel injection rather than older cars use of a carburetor resulting in need for a high fuel pressure.
As the goal is a safe vehicle, where one hose has cracked others are likely next and is therefore in need of changing. This car had a mix of some ill-fitting hose-clamps some factory ones needing to be cut. Importantly using a rotary tool (Dremel) is necessary in releasing some of the old factory crimps, in this case. Happily though, this car is just new enough to have nice long nylon fuel lines so no risk of cracked metal lines.
Clearly this old filter does the car no great service and have to go. Quite a lot of (now not trusted) fuel hoses around the tank indeed. lots of small changes, making a new bracket as well, spraying the under-coat with some rust sealant later on lets me use some non-stainless high pressure clamps with confidence.
With fuel pressure via new hoses, motor oil, filters, fresh gas, sparkplugs, battery, and fogging the cylinders the car starts and idles well. Heating up lots of dust in the process.
Given a likely sound, low-milage 8k, engine, it makes sense to me in going ahead in this quite long term project only working on it about 5 weekends a year. Next step taking care of old degraded rubber hoses for ventilation and cooling of the engine, and there are a few of them. While some are very degraded, crumbling in my hands, others show initial cracks or very cracked surface. So I went ahead and started the long trek of changing all hoses on the car even those in decent shape to have an even starting point. This picture show some of the new and old hoses. Changing all the little ventilation hoses and bits of rubber here and there does add up, mostly using stainless steel clamps and some added sealant to hopefully keep everything air, fuel, or watertight.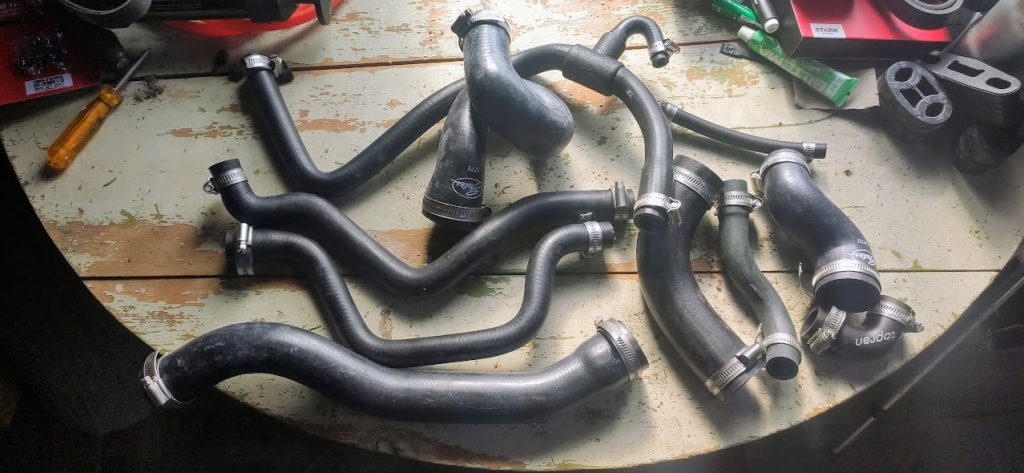
Next there is time to change the belts, water pump, tensioner and thermostat on the engine. Mostly as the car has been sitting, otherwise they where within the service intervals since the car really hasn’t done that many kilometers. less than our 20 years ‘younger’ newer car even. One stripped bolt on the pump needing some work and changing all similar degraded bolts, otherwise fine. Further inspection of the engine is however necessary.
One source is the oil pump relief valve, made to relieve pressure it does seem to release a lot. This is a common issue on these engines it seems, as tiny fragments of metal gets lodged between the valve and housing and in worst case force the valve open or closed. So this can be removed and carefully polished to relieve any scoring, there is nylon versions available common in motor sport as this car is still used in classic rallying. It does also seem to have, a very common, slight leak from the camshaft cover, so cleaning this up and changing the gasket is good to do as well. giving a look at the camshaft, something to be changed down the line, as I want to push another 20bhp, at least, out of the engine.
Having a well running engine, also require other surrounding issues to be considered, changing the rest of the fluids, f.i. coolant and hydraulic fluid. The engine starter, and generator are two other central parts of the package to check the generator seems to be working well enough for now, and has been changed in the past. The generator function can be tested by removing the negative from the car battery while the car is running, it should stay running. Also measuring battery voltage when running and not ( should be higher when car is running and actively charging the battery). The starter should be dry and clean, no obvious smoke sound or issues. However as so happens this does seem to be in need of changing, as one day returning to the project the car just would not start, a few forceful taps at the starter shows that contact may be lacking in the brushes of the internal engine.
Fitting a better sounding, and performing air filter on the intake is also on the checklist, done with some minor manufacturing, should get enough cold air from the two old inlets pointed directly at it, perhaps adding a shroud separating it and the hot engine at a later step. These ‘cone-filters’ sound good and is a nice addition to a car with a smallblock engine such as this, connecting things up with a nice angled tapered silicon hose.
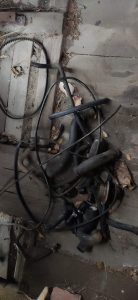
Also the engine needs to breath out as well as in, looking at exhaust. Also here there are things to do. Shortly before getting parked the silencer got lost.. and the rubber holding the rest of the package has degraded badly and dropped everything. the Catalytic converter and middle resonator seems fine for now, so a rear silencer and some decent 2.5″ 63mm instead of 45mm pipe is all that is needed.
Changing from such tiny to decent sized piping is not easy as the car is not built for this I ended up having to send the pipe below the rear beam, common in lowered cars, as this now is, more in another post. Also I used to have access to a TIG welder but now no more so will have to do with clamps and sealants. The new pipe and box does give the engine some increased sound to be sure, will have to see if an added silencer is needed later (a small ‘glasspack’).
So the engine inhales and exhales as it should, better, and will function reliably ready for actual modification. But first would be to fix, and update, the brakes, in need of a full restoration. Changing to a complete other system with new pipes, cylinder, booster, disks calipers. To this is a complete change of suspension as well, with all new front and rear parts, all parts much improved over stock.
In conclusion, the engine is doing well for its age and as it has recorded low mileage and spent its whole life in the family under gentle tutelage it may do well as a car for short trips, and more during winter when a second/third car is necessary. Though quite a lot of further work is required, because Swedish weather conditions there is quite a bit of rust left and needing some fresh paint here.